
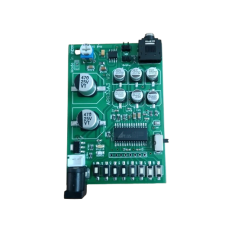
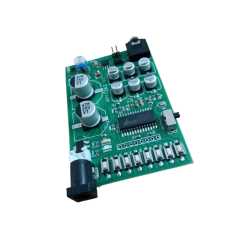
The APR33A3 Voice Recorder and Playback Module offers a reliable solution for recording and playing audio messages. It features 8 voice channels, with each channel capable of recording for 1.3 minutes, providing a total of 11 minutes of audio storage. This module is perfect for various applications like robotics, lift voice announcements, and token message playback. The onboard microphone ensures easy recording without additional equipment, making it user-friendly.
With APR33A3 Voice Recorder and Playback Module, enjoy seamless audio output through its speaker connection or direct audio output for public address systems. The device operates on a 12V AC/DC supply and utilizes non-volatile flash memory technology, eliminating the need for battery backup. This ensures that your recordings remain intact even when powered off. Ideal for both hobby projects and professional installations, this module simplifies audio recording and playback.
Explore the potential of the APR33A3 Voice Recorder and Playback Module for your next project. Its straightforward operation and versatile applications make it a valuable addition to any electronic setup, whether in educational, commercial, or personal use.
At DNA, we provide a diverse range of Audio, Sound and Voice Modules from trusted brands. Discover the APR33A3 Voice Recorder and Playback Module and explore other products in this category. Check other "Audio, Sound and Voice Module" that we have in stock.
If you're searching for specific electronic components, DNA has you covered. We can import hard-to-find parts and support both retail and bulk orders. Explore items like DC to DC Converter IC, Hongfa Relay, and more. Contact Us.
See 1 Ratings & Reviews |
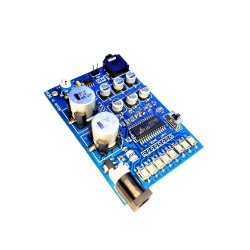
The APR33A3 Voice Recorder and Playback Module offers a reliable solution for recording and playing audio messages. It features 8 voice channels, with each channel capable of recording for 1.3 minutes, providing a total of 11 minutes of audio storage. This module is perfect for various applications like robotics, lift voice announcements, and token message playback. The onboard microphone ensures easy recording without additional equipment, making it user-friendly.
With APR33A3 Voice Recorder and Playback Module, enjoy seamless audio output through its speaker connection or direct audio output for public address systems. The device operates on a 12V AC/DC supply and utilizes non-volatile flash memory technology, eliminating the need for battery backup. This ensures that your recordings remain intact even when powered off. Ideal for both hobby projects and professional installations, this module simplifies audio recording and playback.
Explore the potential of the APR33A3 Voice Recorder and Playback Module for your next project. Its straightforward operation and versatile applications make it a valuable addition to any electronic setup, whether in educational, commercial, or personal use.
At DNA, we provide a diverse range of Audio, Sound and Voice Modules from trusted brands. Discover the APR33A3 Voice Recorder and Playback Module and explore other products in this category. Check other "Audio, Sound and Voice Module" that we have in stock.
If you're searching for specific electronic components, DNA has you covered. We can import hard-to-find parts and support both retail and bulk orders. Explore items like DC to DC Converter IC, Hongfa Relay, and more. Contact Us.

